The satellite view is available in KPRC's Storm Tracker 2 Weather app radar. Here is how can change the default view to the satellite view.
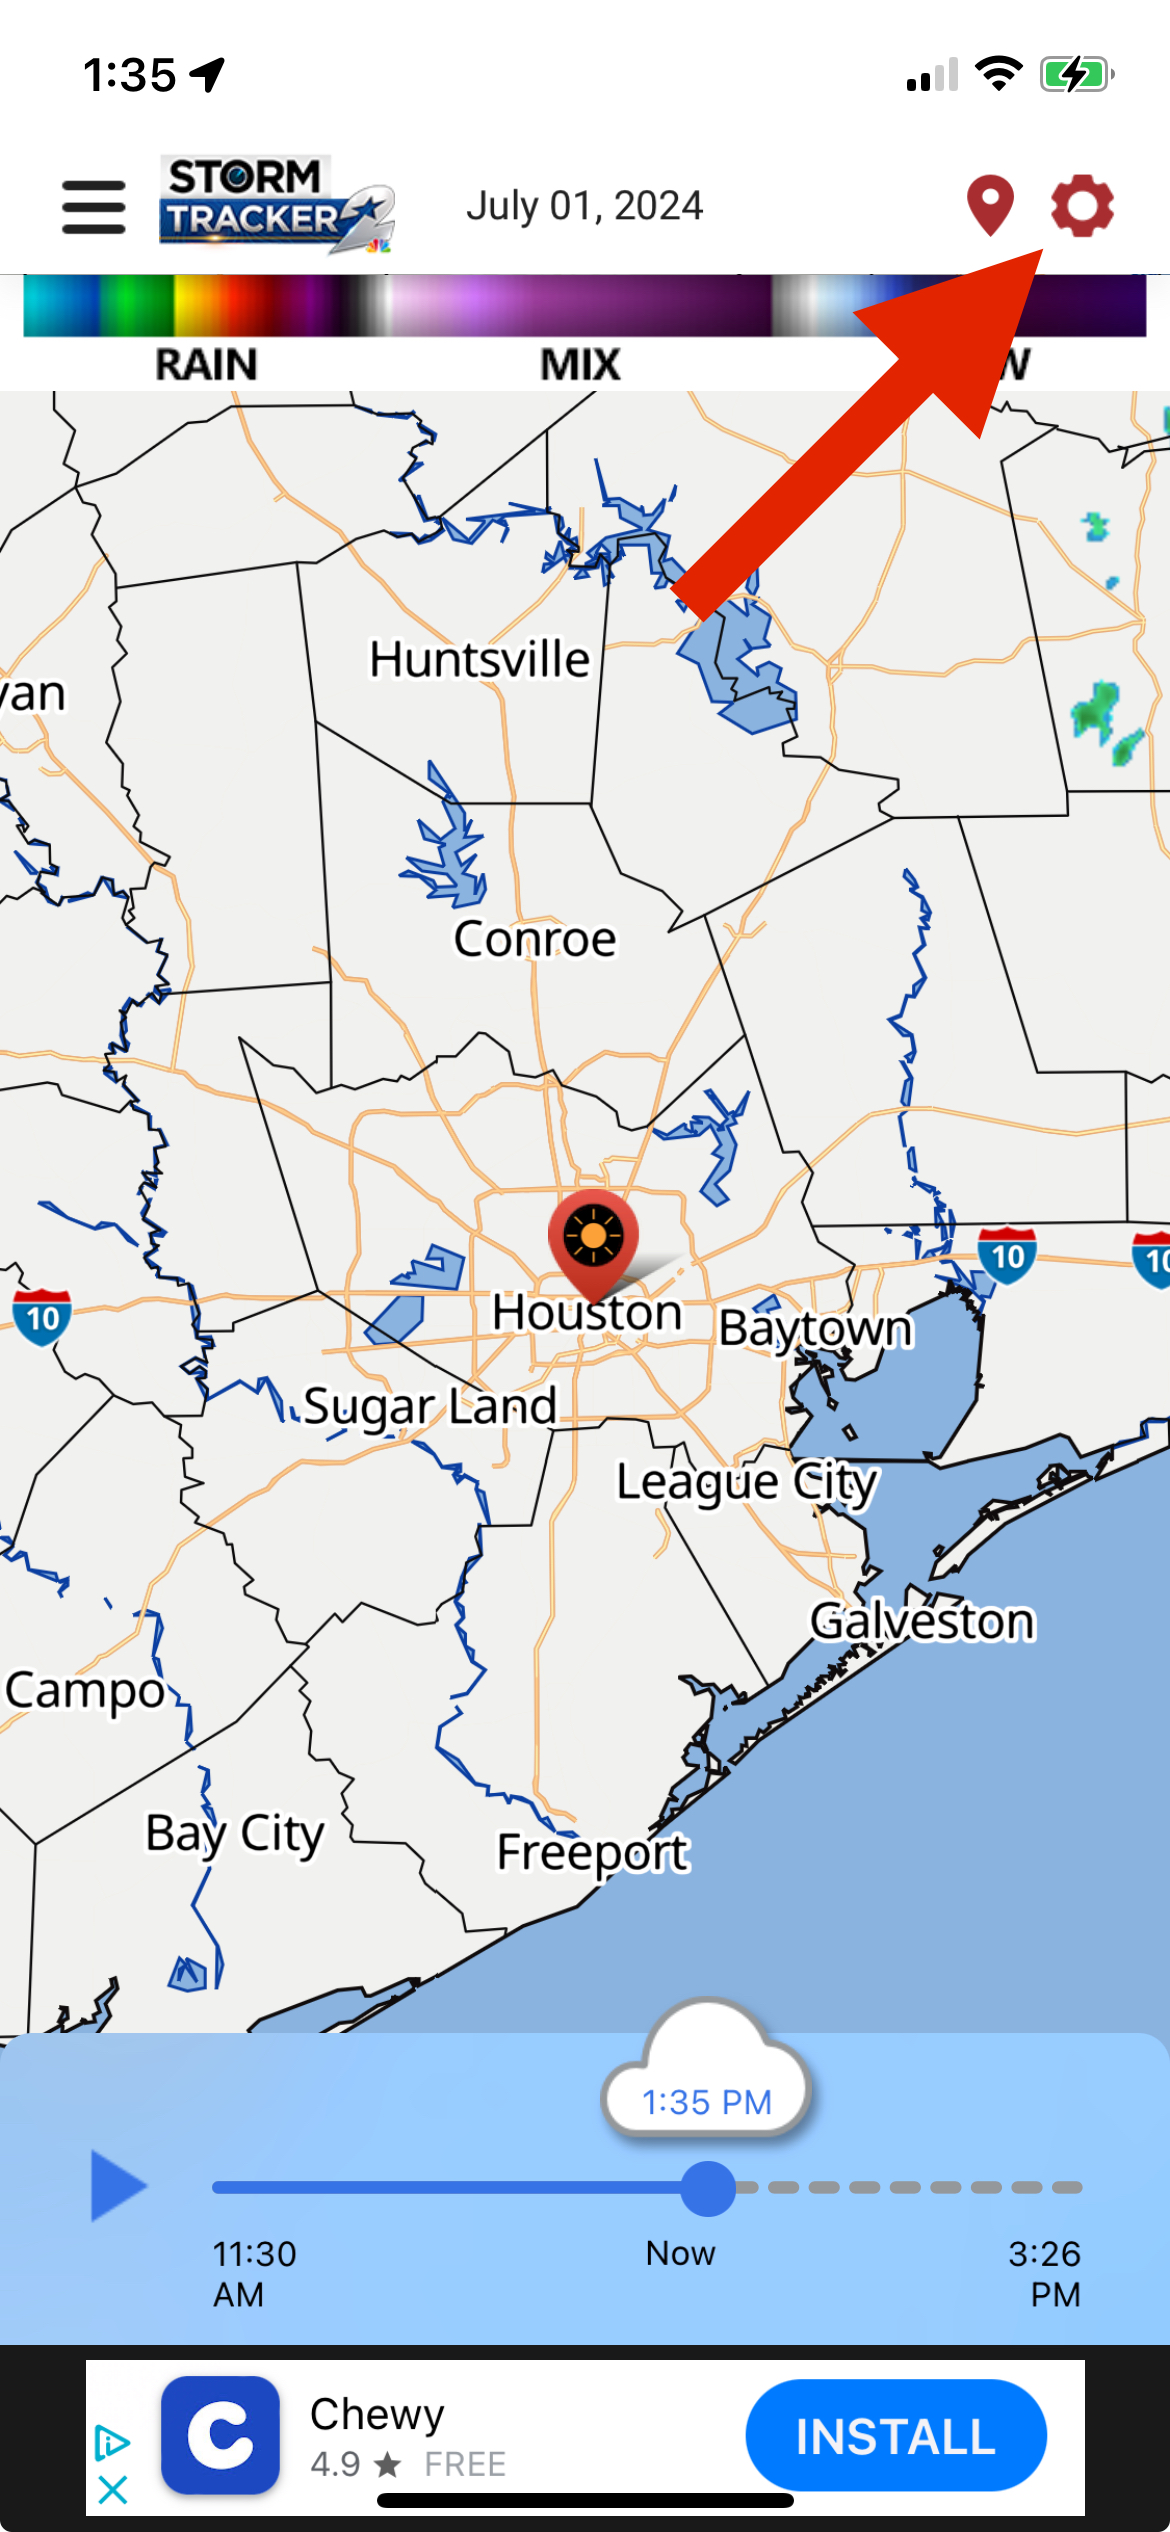
Step 1: Open the radar in the weather app
The default view shows a plain background with no contours, tree or buildings. You can switch this view by tapping the gear in the upper right corner.

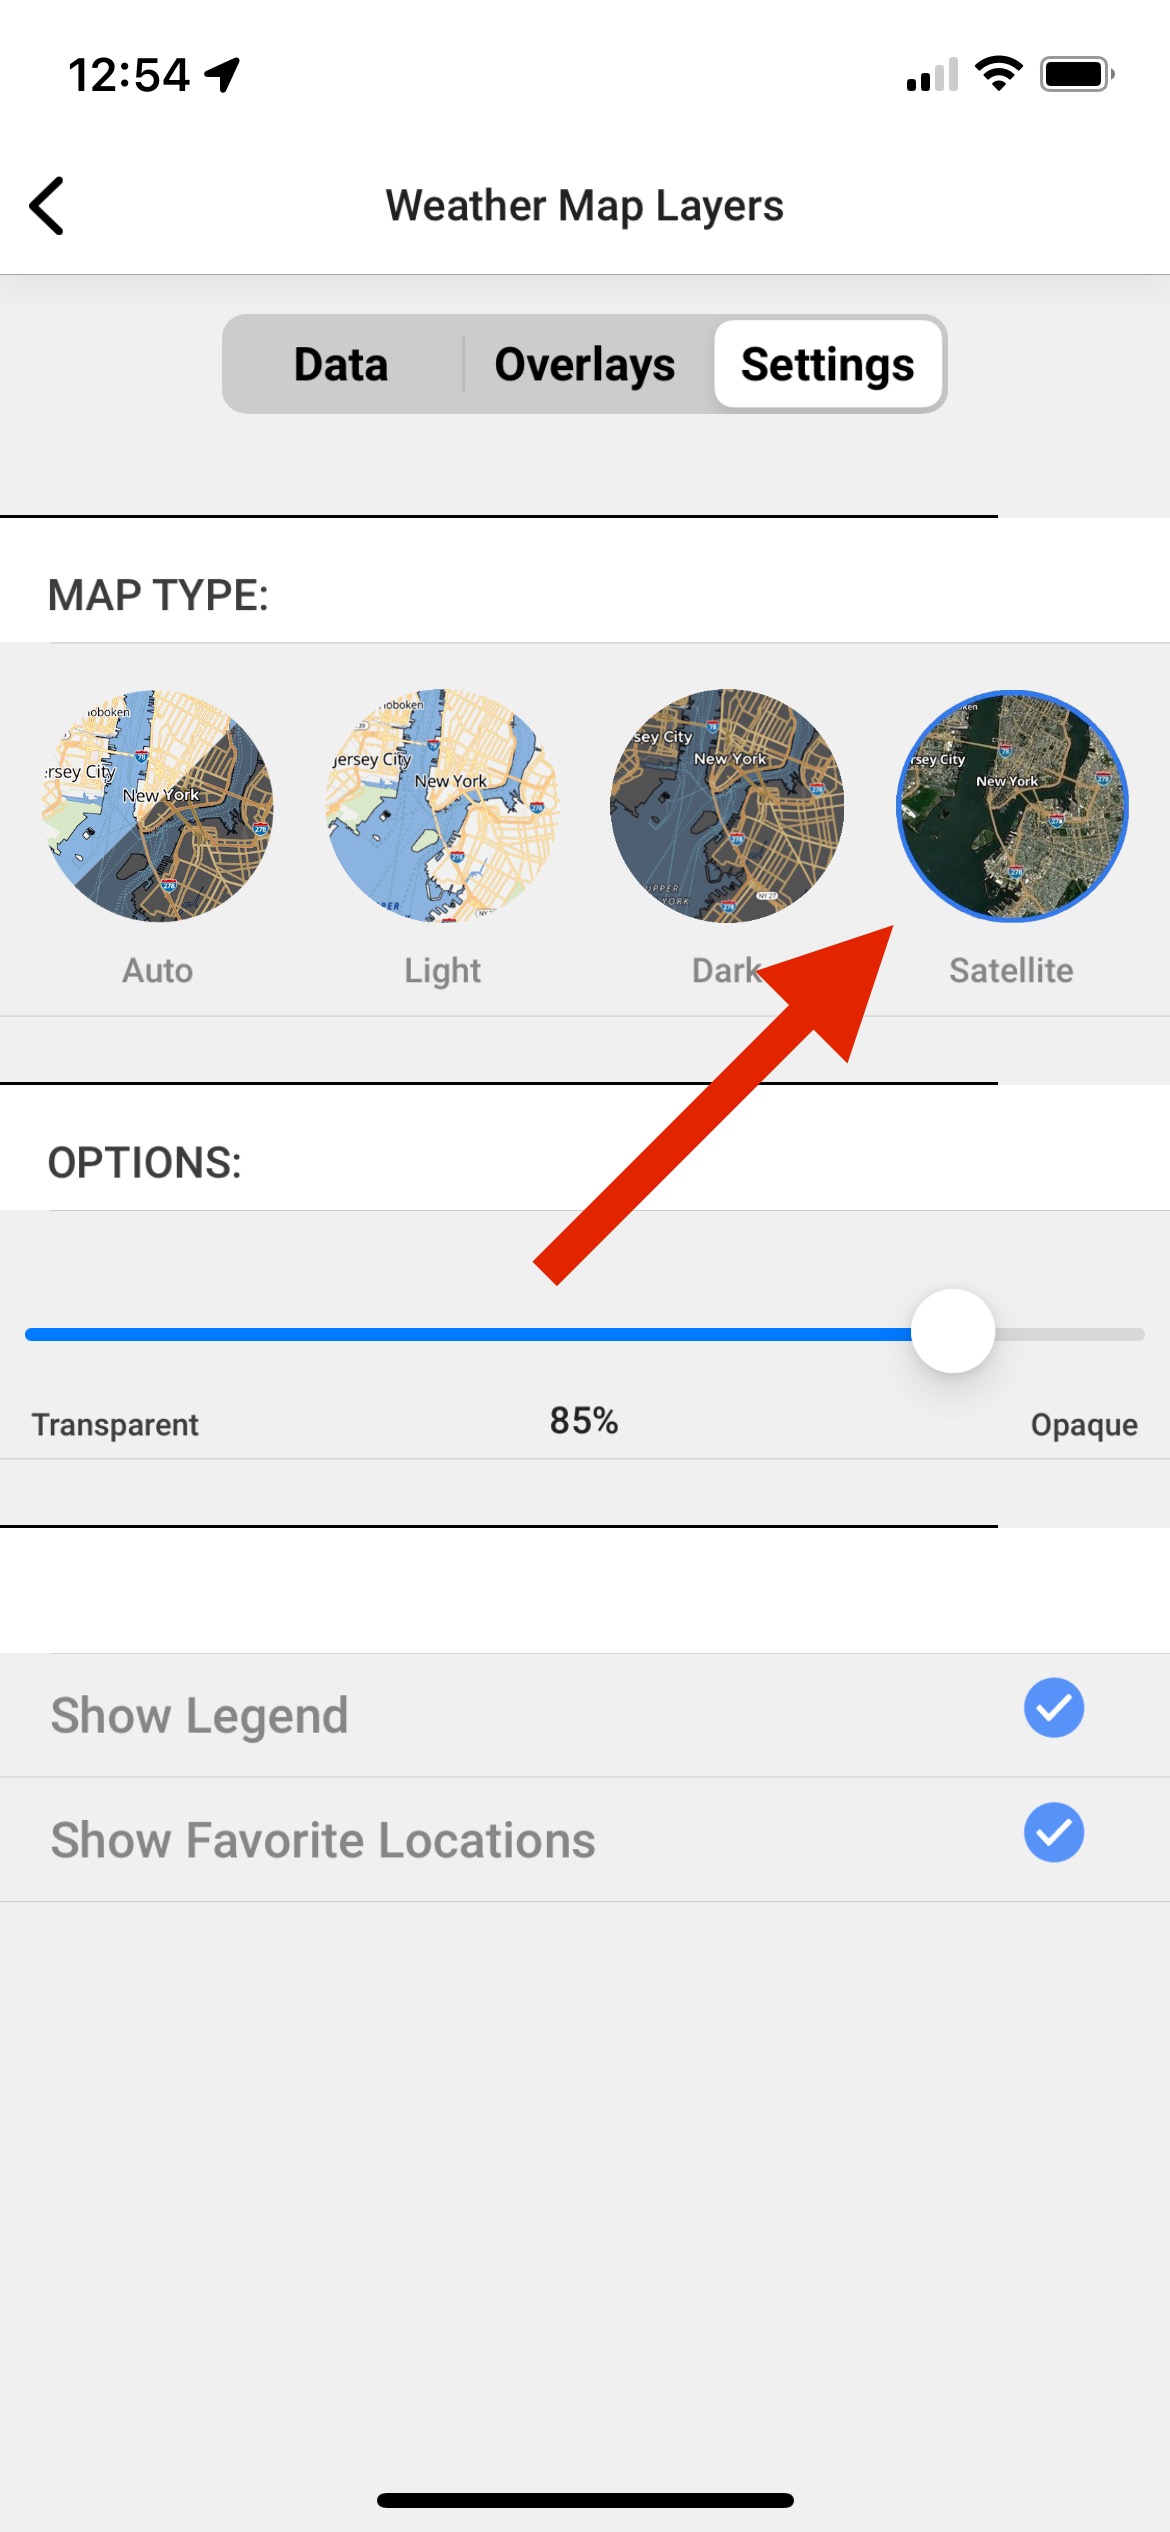
Step 2: Select 'Satellite' under Map Type
After opening the gear menu, you'll see four options under "MapType." The "auto" view switches the plain background between "Light" and "Dark" mode, depending on your device's setting. The "Satellite" view will include buildings, trees, and contours. To select the Satellite view, tap the circle.
The slider between "Transparent" and "Opaque" determines how much of the map you see through clouds on the radar. Setting to 100% blocks the underlying map with the radar images. Setting to 0% removes the radar images completely. The default setting is 85%.
Tap the arrow in the upper left corner to return to the radar.

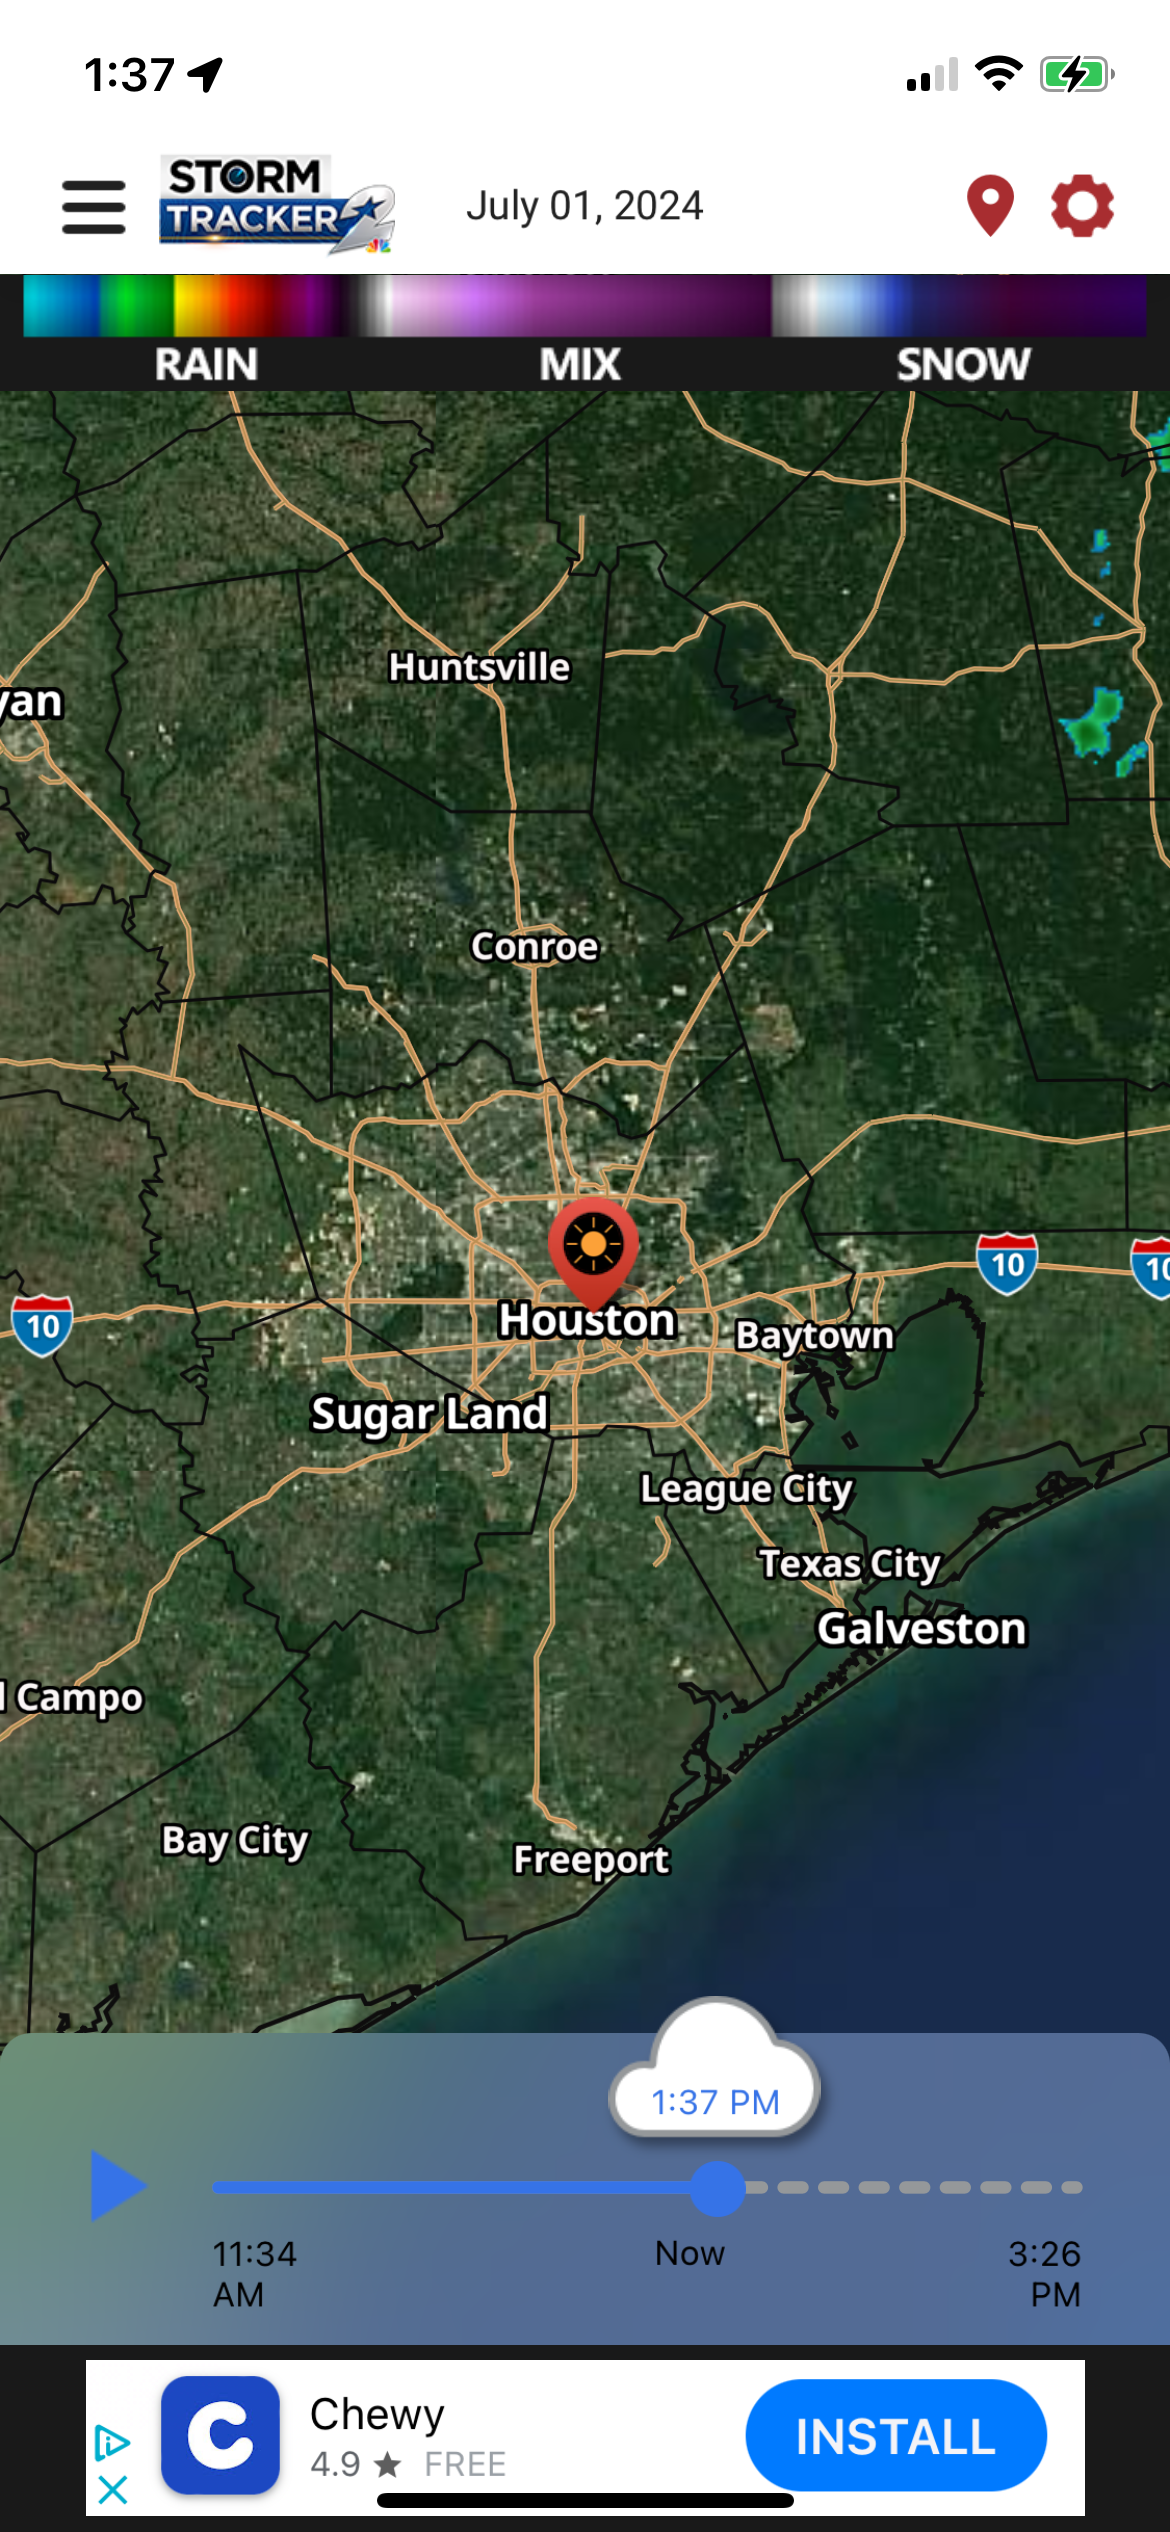
Step 3: Return to the radar
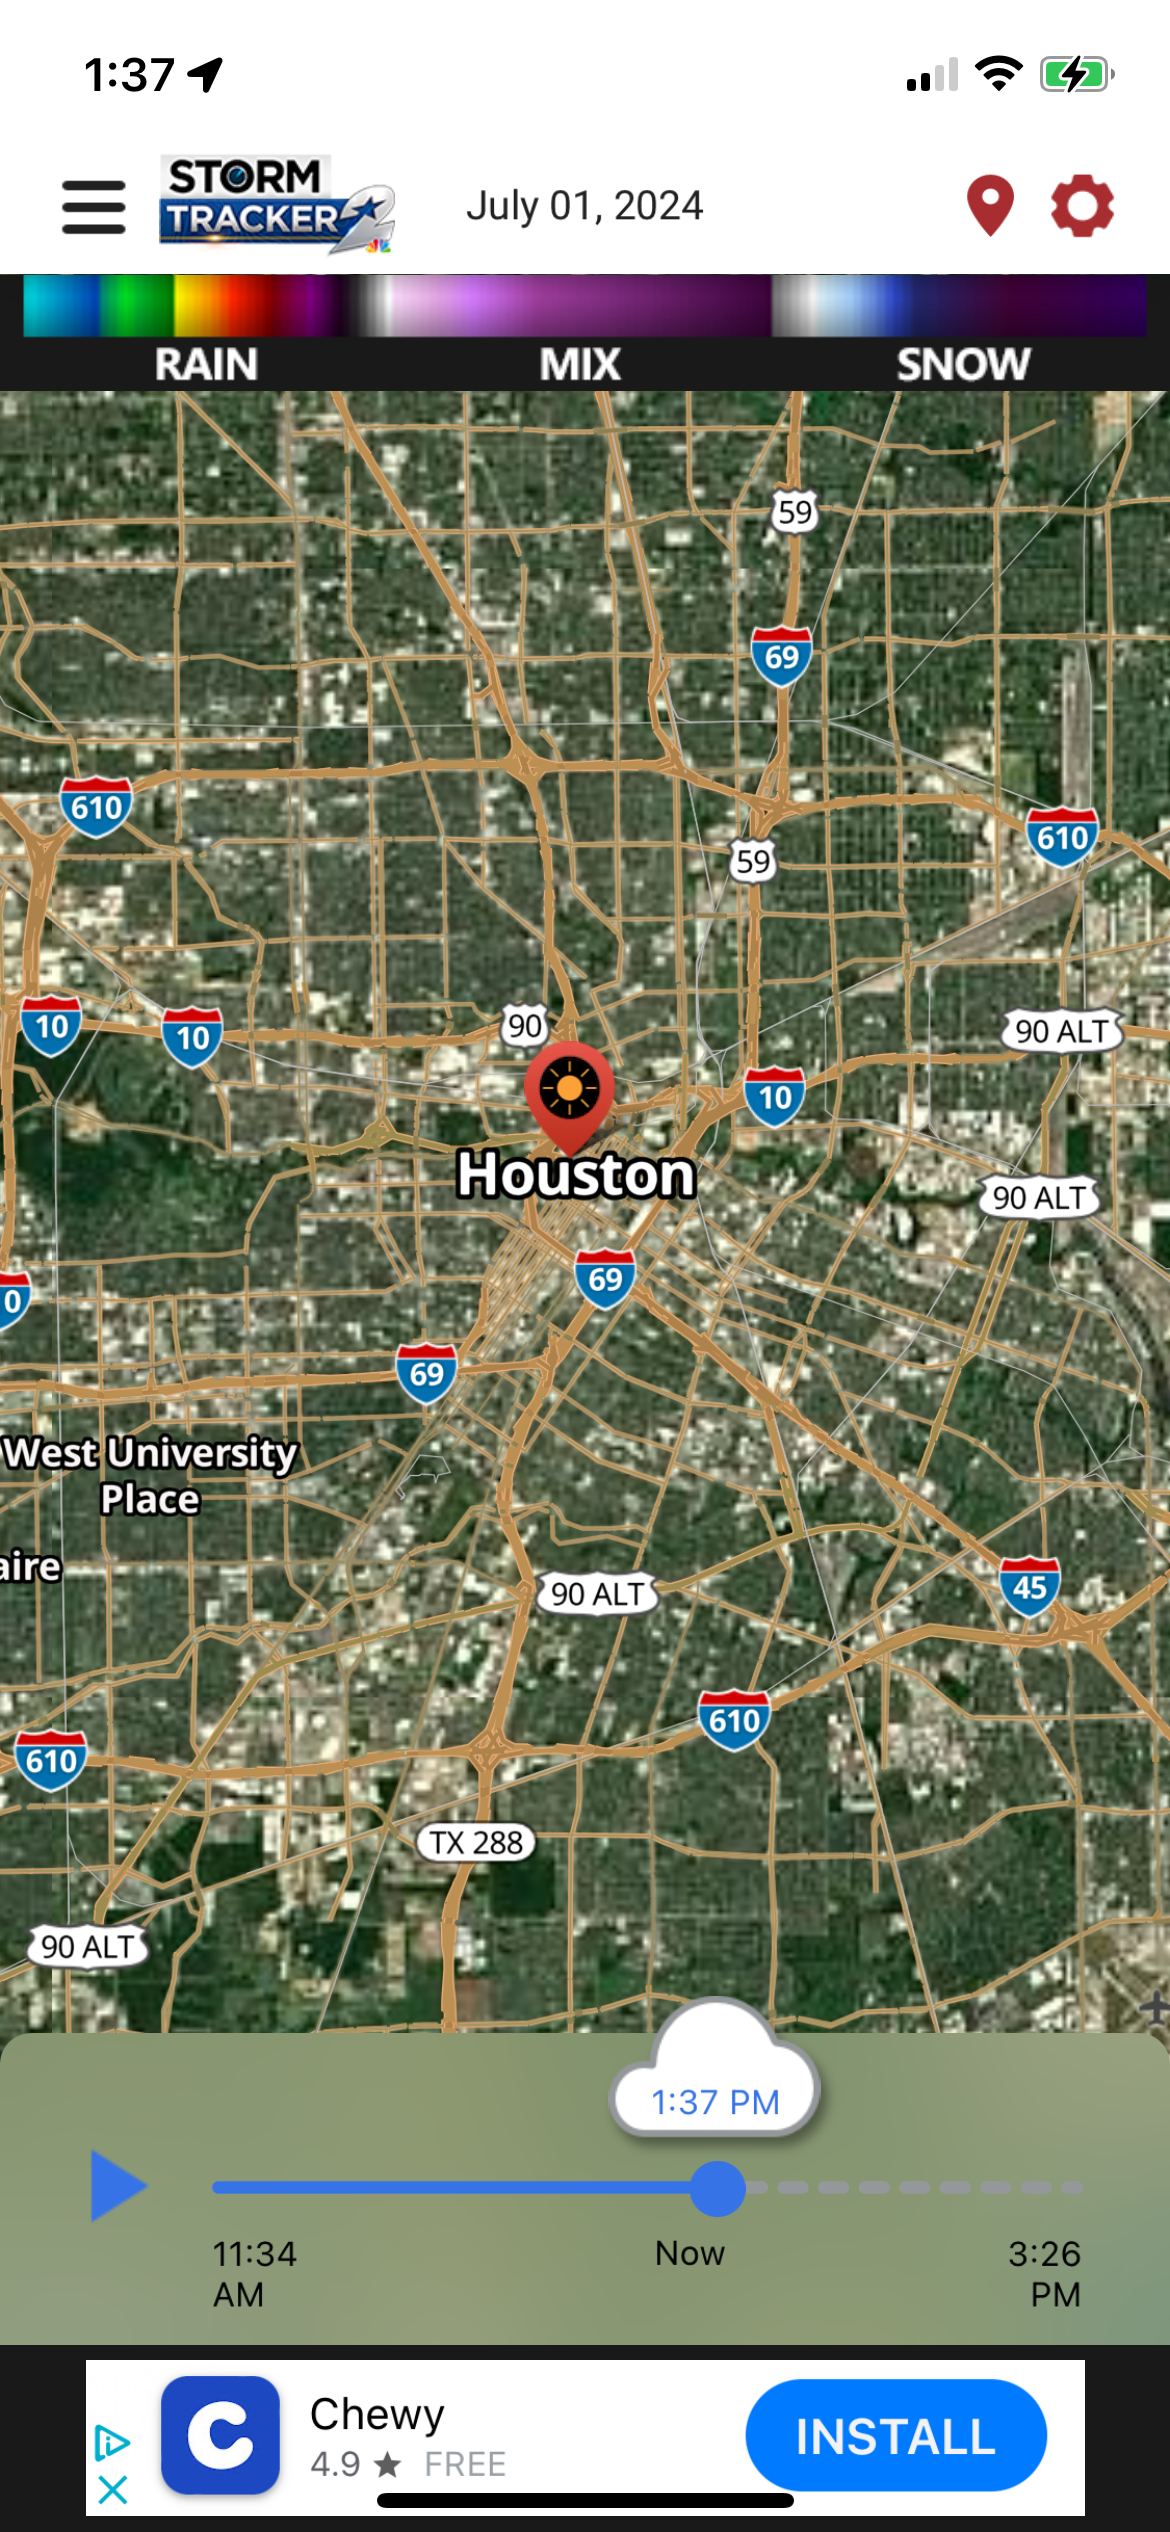
You now have the Satellite view turned on. You can use your fingers to zoom in on the map to see ground-level buildings more clearly.


Conclusion
The Satellite view in the radar will remain in place until you switch to a difference view.


